Zazzle has a great selection of custom, artist-crafted wedding invitations, and many of them include a matching RSVP card that you can customize to use text RSVPs. Instead of paying the extra money buying envelopes and additional stamps, you can use text RSVPs for your wedding and spend your wedding budget on the more important things.
What’s also great is when you use Replied App automatic text RSVPs, your RSVPs count themselves and you can view them online on the Replied App RSVP website. We’ll walk you through an example of how to setup your Zazzle invitation using one of our favorite wedding invitation designs!
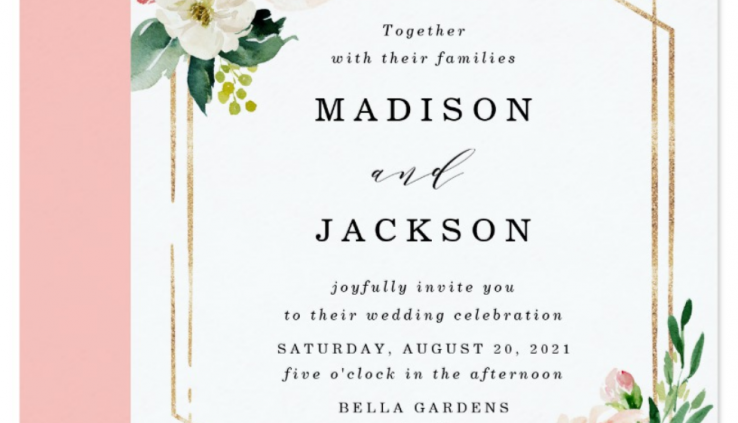
Step 1 – Personalize your Zazzle Wedding Invitation
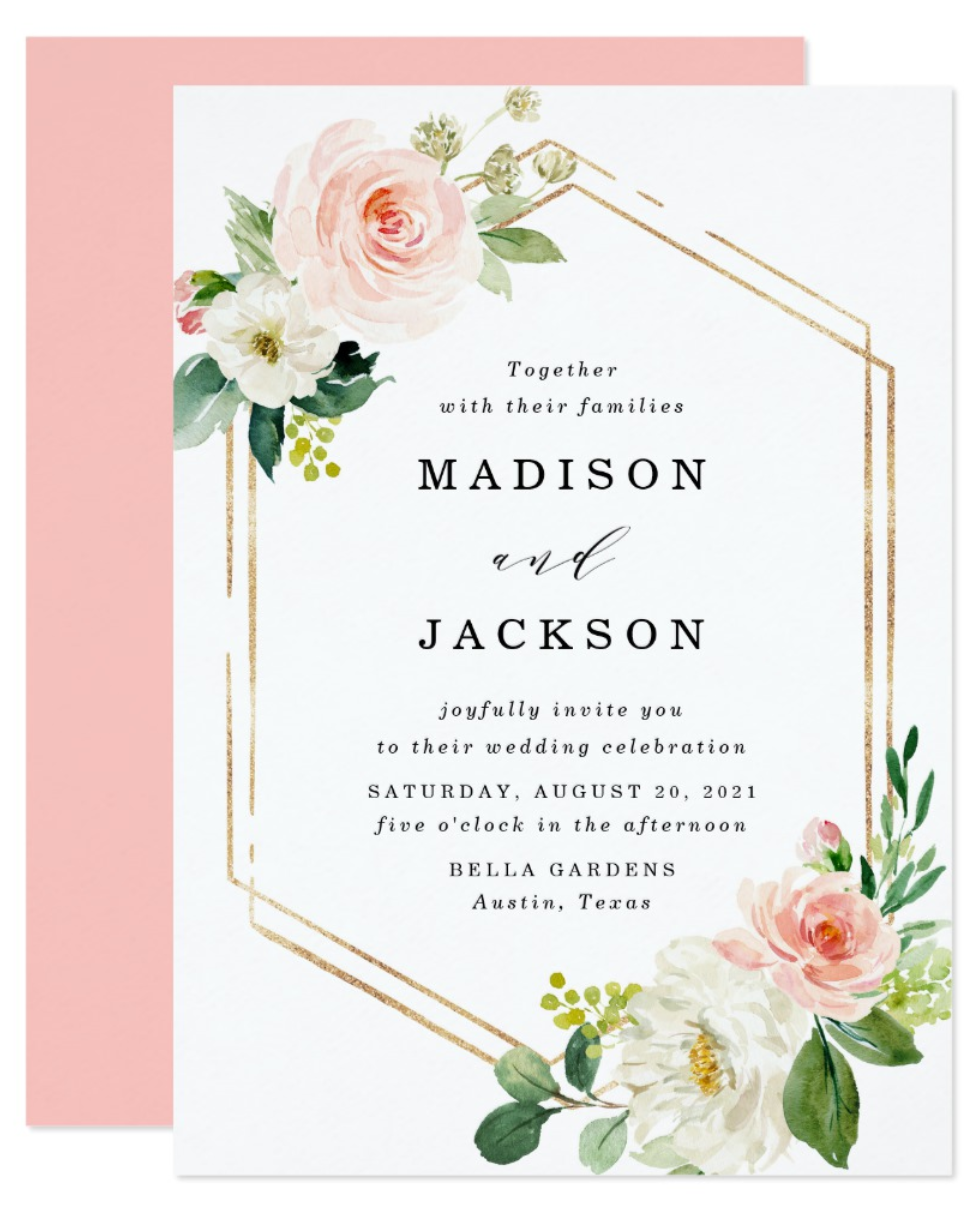
Zazzle allows you to edit your wedding invitation right there on their website, so firstly you’ll want to click the blue “personalize” link on the right side of the screen. This will open the Zazzle invitation editor, which is a little window with a scroll bar. You can edit the names of the couple, and most of all the rest of the text on the invitation. Start with the easy part, filling out your names. You’ll see a Name 1 and Name 2 field and you’ll want to click in the little boxes and delete the placeholder name and put your names.
As you edit the wedding invitation, you’ll notice the invitation displayed on the screen will also change. Magic!
Next you’ll want to put the correct time and date of your wedding. Like before, click in each box, delete the placeholder text with your backspace key, and enter your wedding information. You’ll see the Zazzle wedding invitation change as you edit.
That should be all you need to do to get your wedding invitation customized, BUT, if you’re a more technical person and there’s something on the invitation that you really don’t like, Zazzle has an advanced invitation editor that you can open and delete blocks of text. To get to this editor, scroll to the very bottom of the edit area and click “Click to Customize Further”
This will bring you to a screen that almost looks like Photoshop. Lots of buttons and options to use. The most useful part of this editor is the ability to delete sections of text. Let’s say, for example, that you didn’t want the “Together with their families” part of the invitation. Simply click the text box where this text resides, and then click delete on your keyboard. Poof, gone! Now just click “Done” on the top right of the screen and you can see your updated Zazzle wedding invitation.
Now that you’re done editing, you can click the drop down next to “Qty” (quantity) and select how many invitations you need. Remember, always have an extra 10 invitations just in case. You never know, you might decide close to your wedding that there’s someone that you really want to come that you didn’t think of sooner. AFter you select a quantity, click “Add to cart” but don’t go to checkout yet! We still need to customize your RSVP cards.
Step 2 – Setup your RSVP cards for text message RSVPs
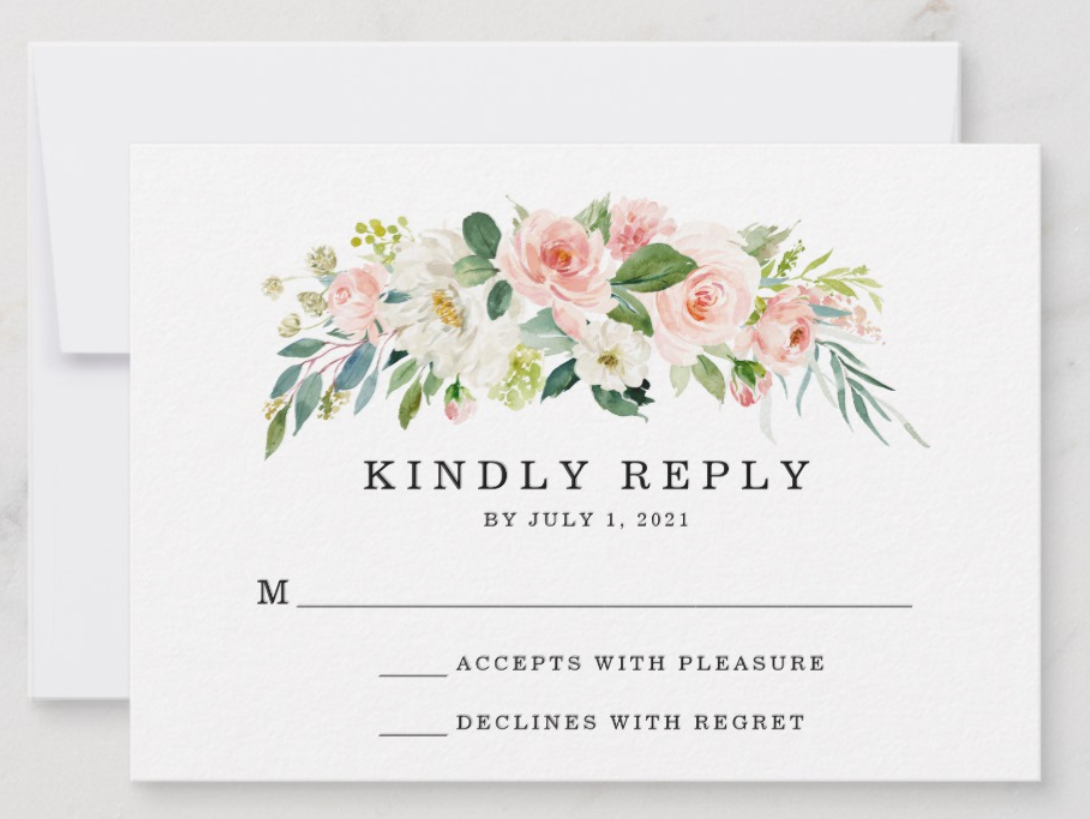
While you’re still on the screen with the Zazzle Wedding Invitation, if you scroll down the page you’ll see an area that says “other products from this collection.” This is where you’ll find the RSVP card that matches the Zazzle wedding invitation design that you used above. Click that link and it’ll take you to the RSVP card editor page. Just like with the wedding invitation, click the big blue “Personalize” button so we can start editing.
Instead of using the simple editor, we are going to use the advanced editor, so click the blue button at the bottom that says “Click to customize this further”
First thing you’ll want to do is click the big lines and delete them with your delete key. We don’t need them for text message invitations, no one will be writing on these cards of have to mail them to you! Click each line one at a time and click the delete key.
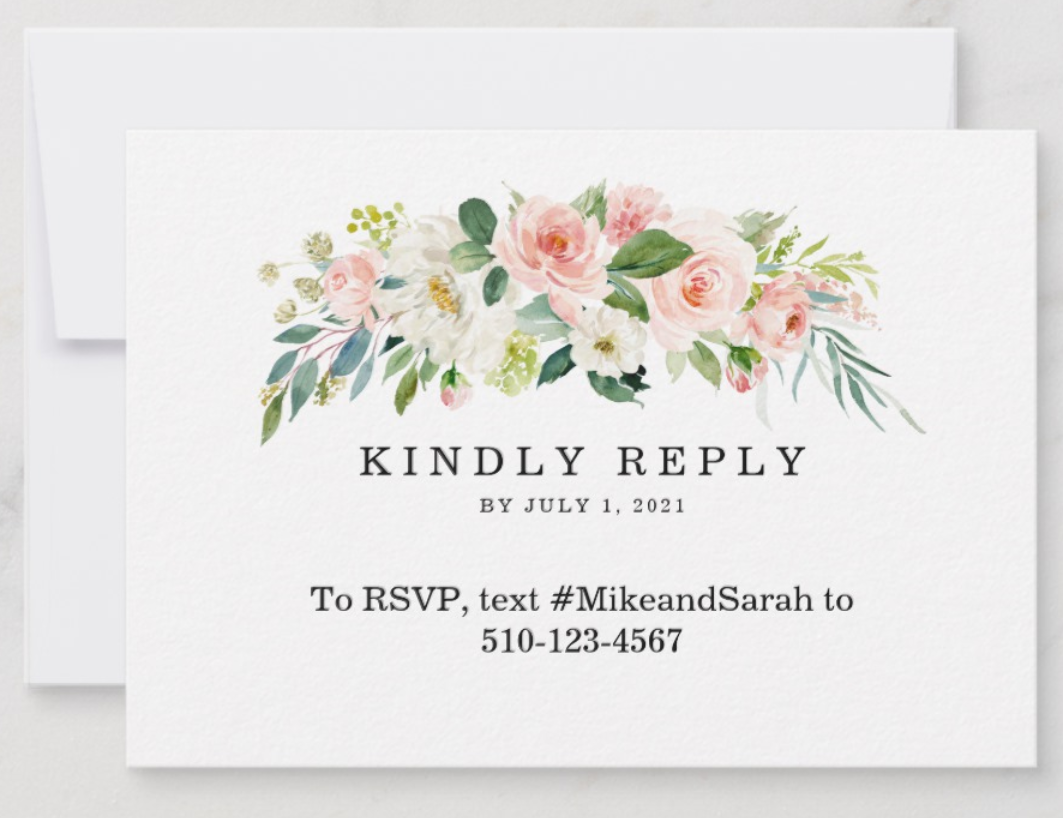
When those annoying lines are gone, click the “M” and so we can reword it. Once you click the “M,” start typing and type “To RSVP, text #ourweddinghashtag to 510-234-5678”
Obviously you will be using your actual wedding hashtag (or any word you want to use – Replied App will reply regardless) and use your Replied App text RSVP phone number. Once you type in the text from above, you can drag, center, and resize the text box as need be (use the little white circles on the edges of the box to resize the box and be sure to drag it to the middle of the screen). You can also delete any other text boxes on the RSVP card by selecting the text box and clicking the delete key on your keyboard.
Click the “Done” button on the top right of the screen when you’re finished and marvel at your beautiful RSVP card!
Select the same quantity as you did for the invitations and then select “Add to cart.” Now that you have everything you need, you can click the little shopping cart on the top right of the page and checkout. Easy as that!
Once your guests receive your invitations, the text message RSVPs will start flowing in. You can view the RSVPs in your Replied App RSVP dashboard by logging in at Replied App and clicking the RSVPs button on the left side of the screen.