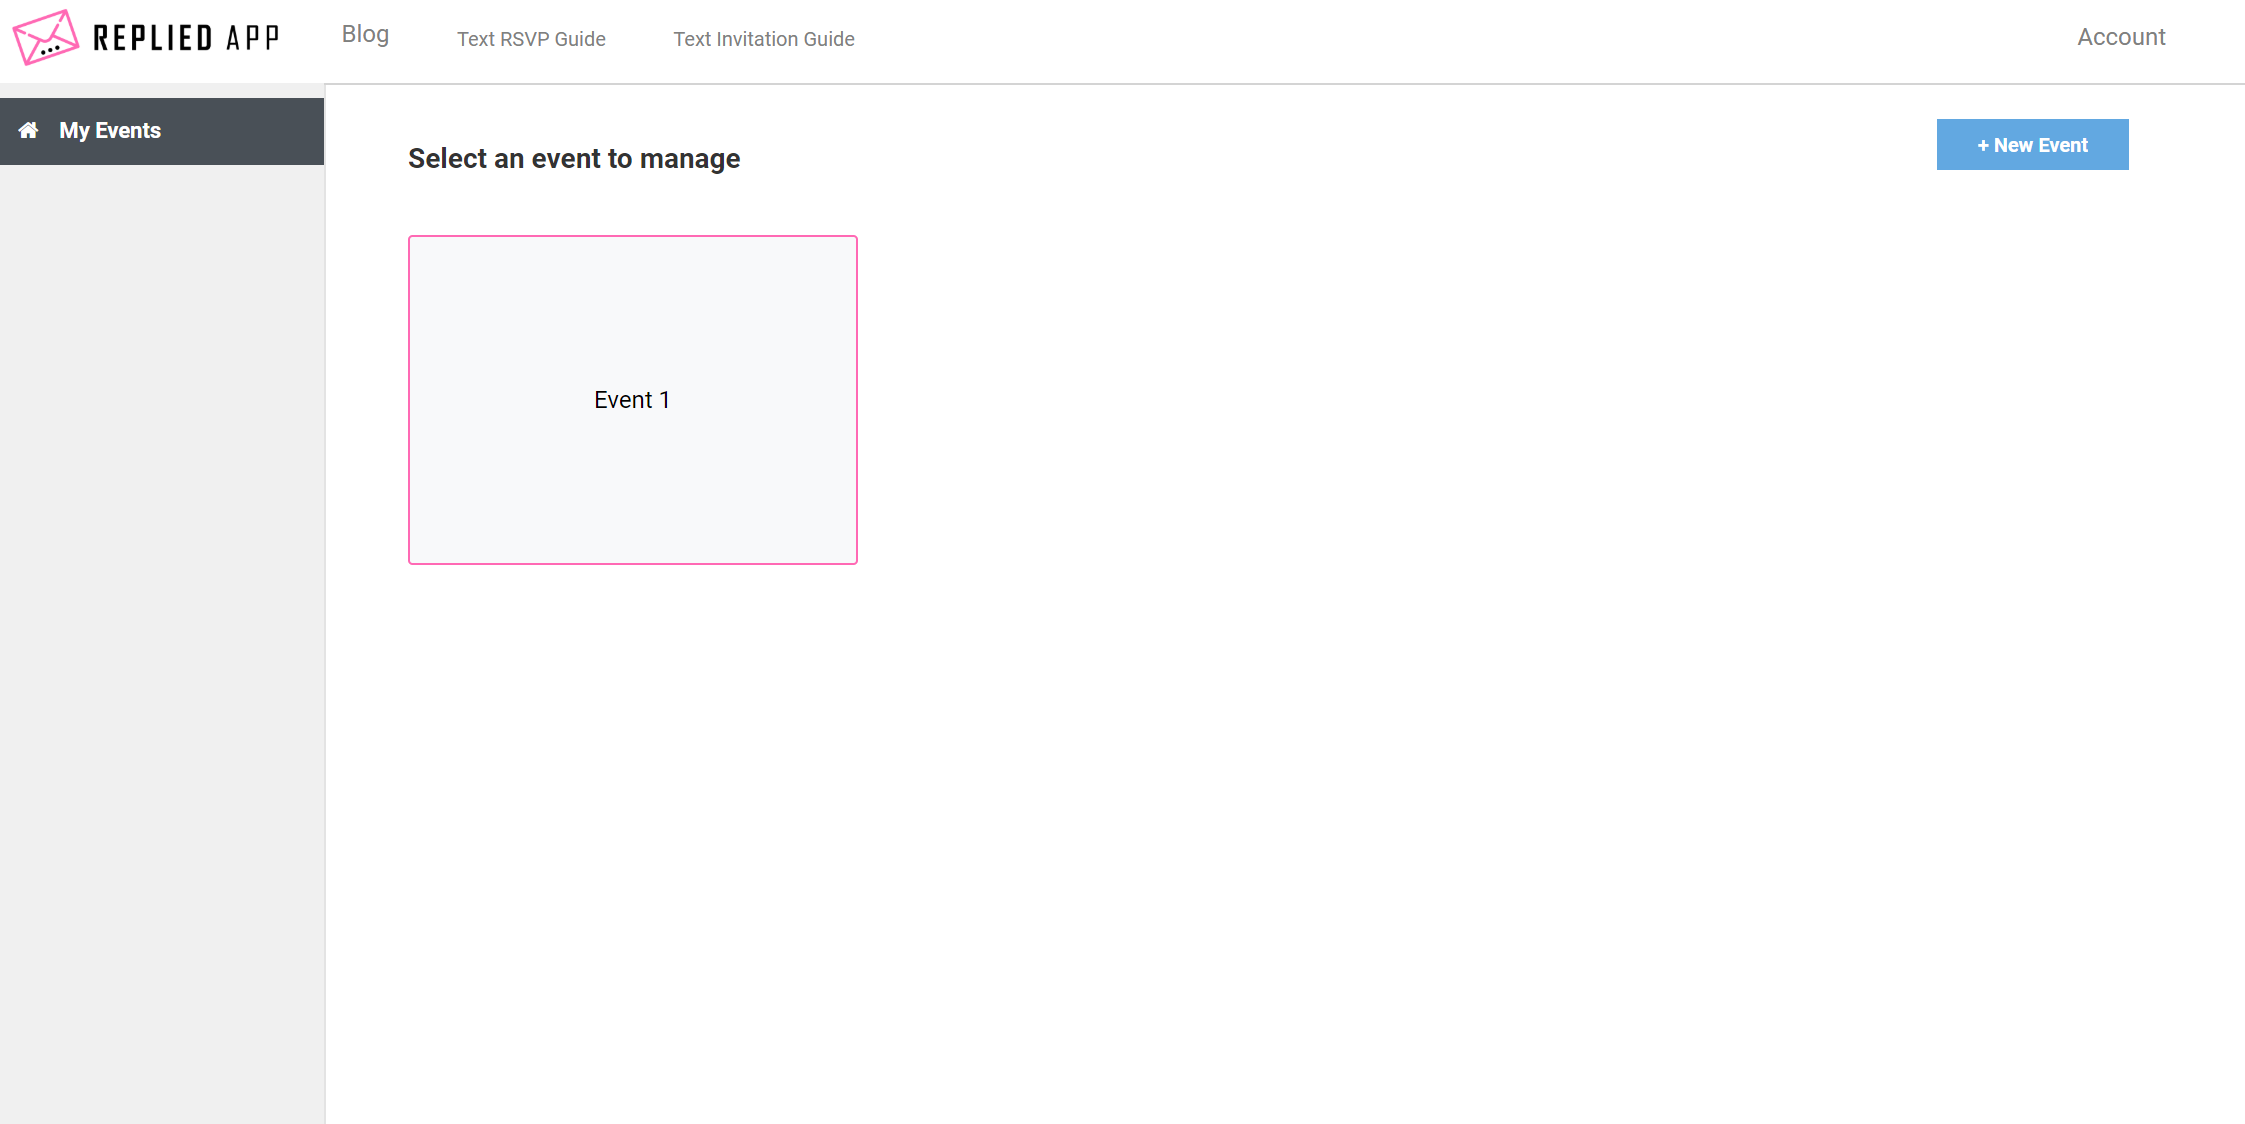
Step 1: Create your event
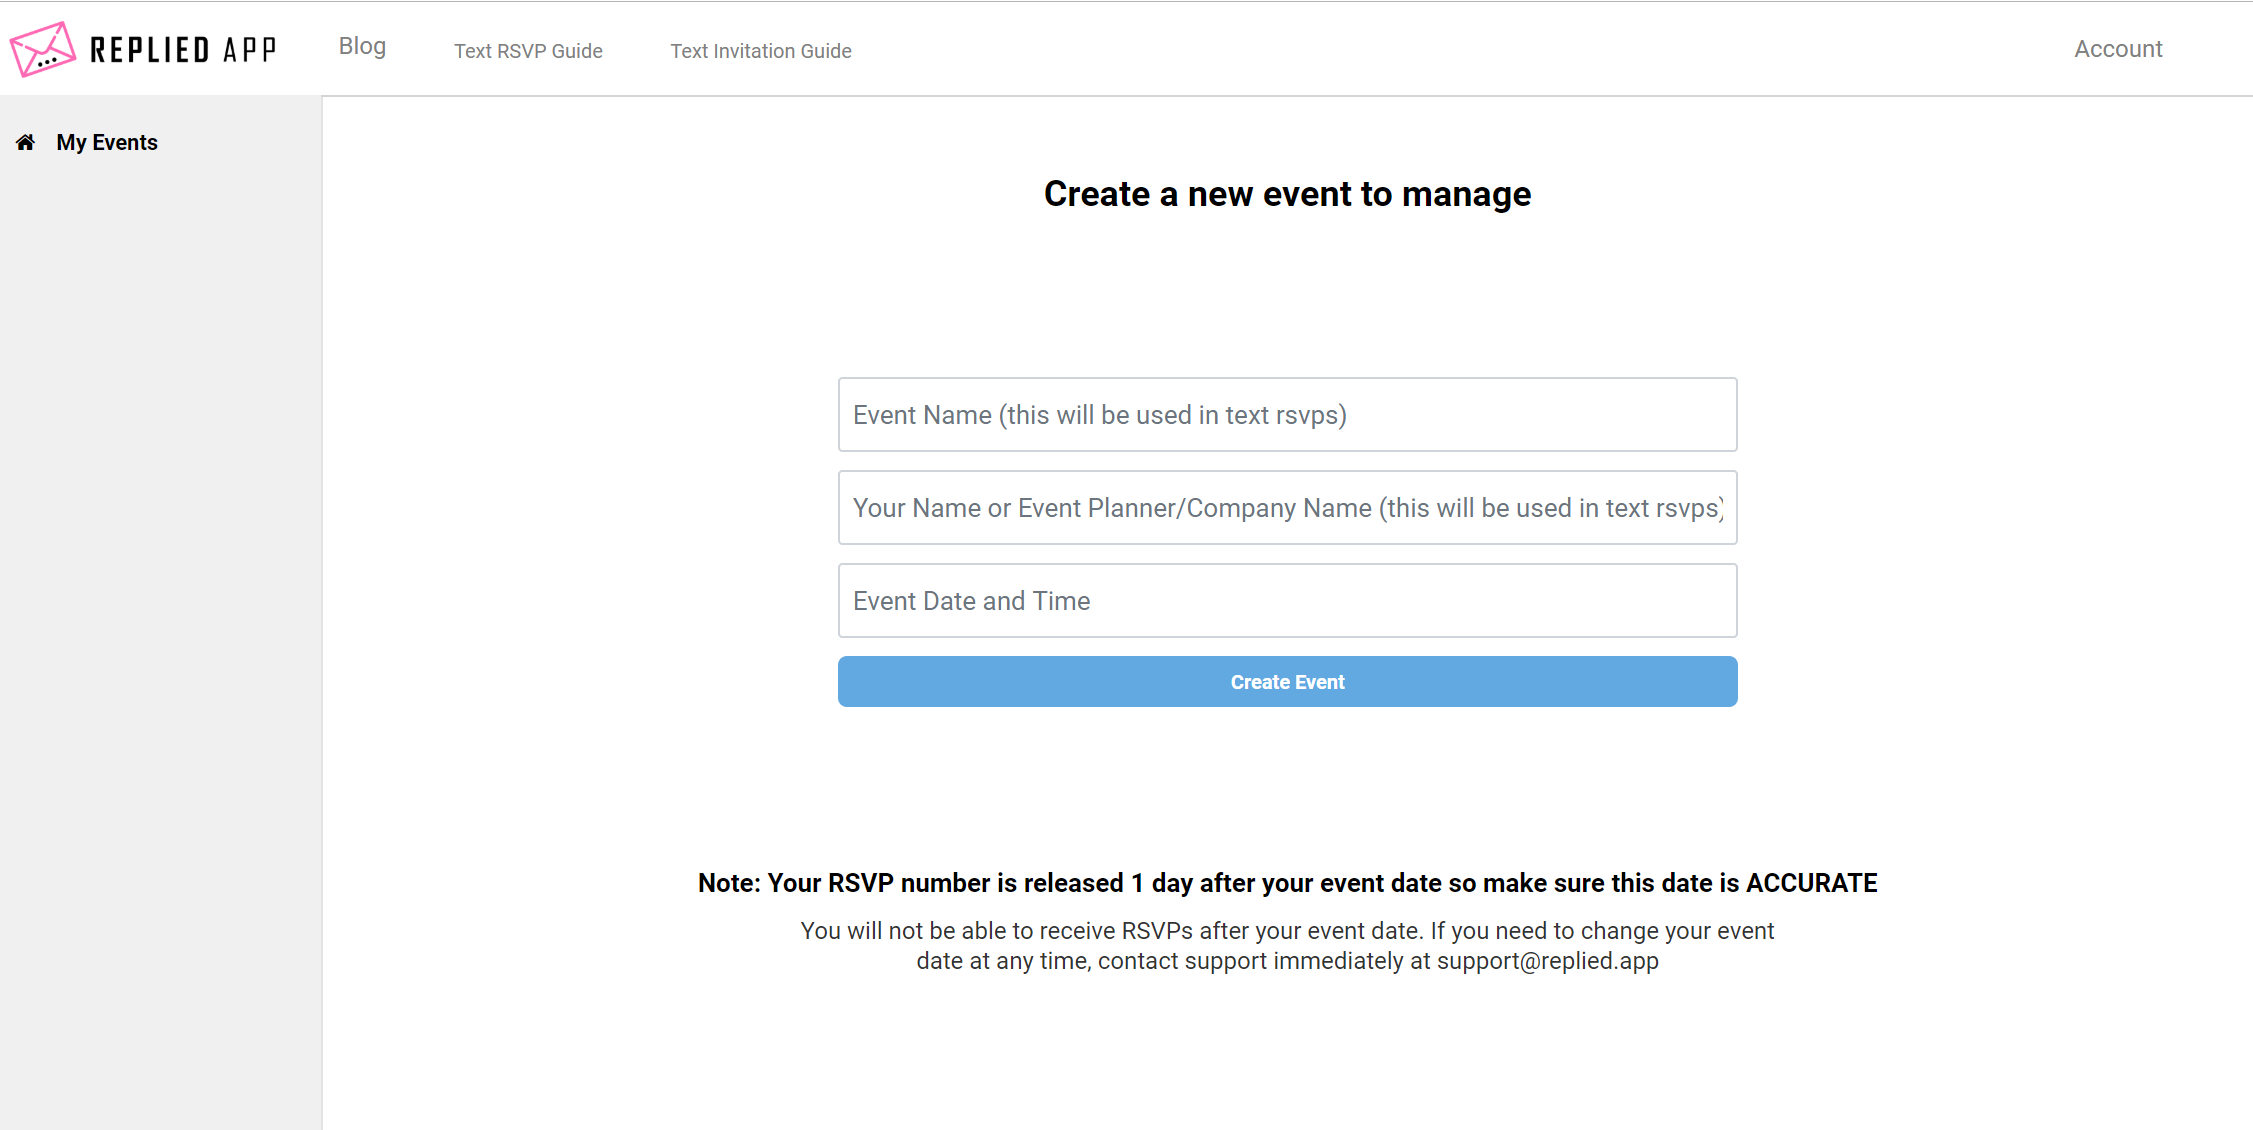
Before you can do anything, you need to create your event and include an ACCURATE event date and time. Right after you login to Replied App, you’ll be at your home screen and you’ll see a blue button on the top right that says “+ New Event.” Click that button and you’ll be taken to the create event screen.
Enter the CORRECT date and time for your event, this cannot be changed later without emailing support@replied.app. You’ll also enter an event name, make sure this is descriptive because your attendees will see this in the text messages. In the event planner field, if you’re not a professional event planner then just put your own name. When you’re done filling ou the fields click “Create Event” and your event will be created.
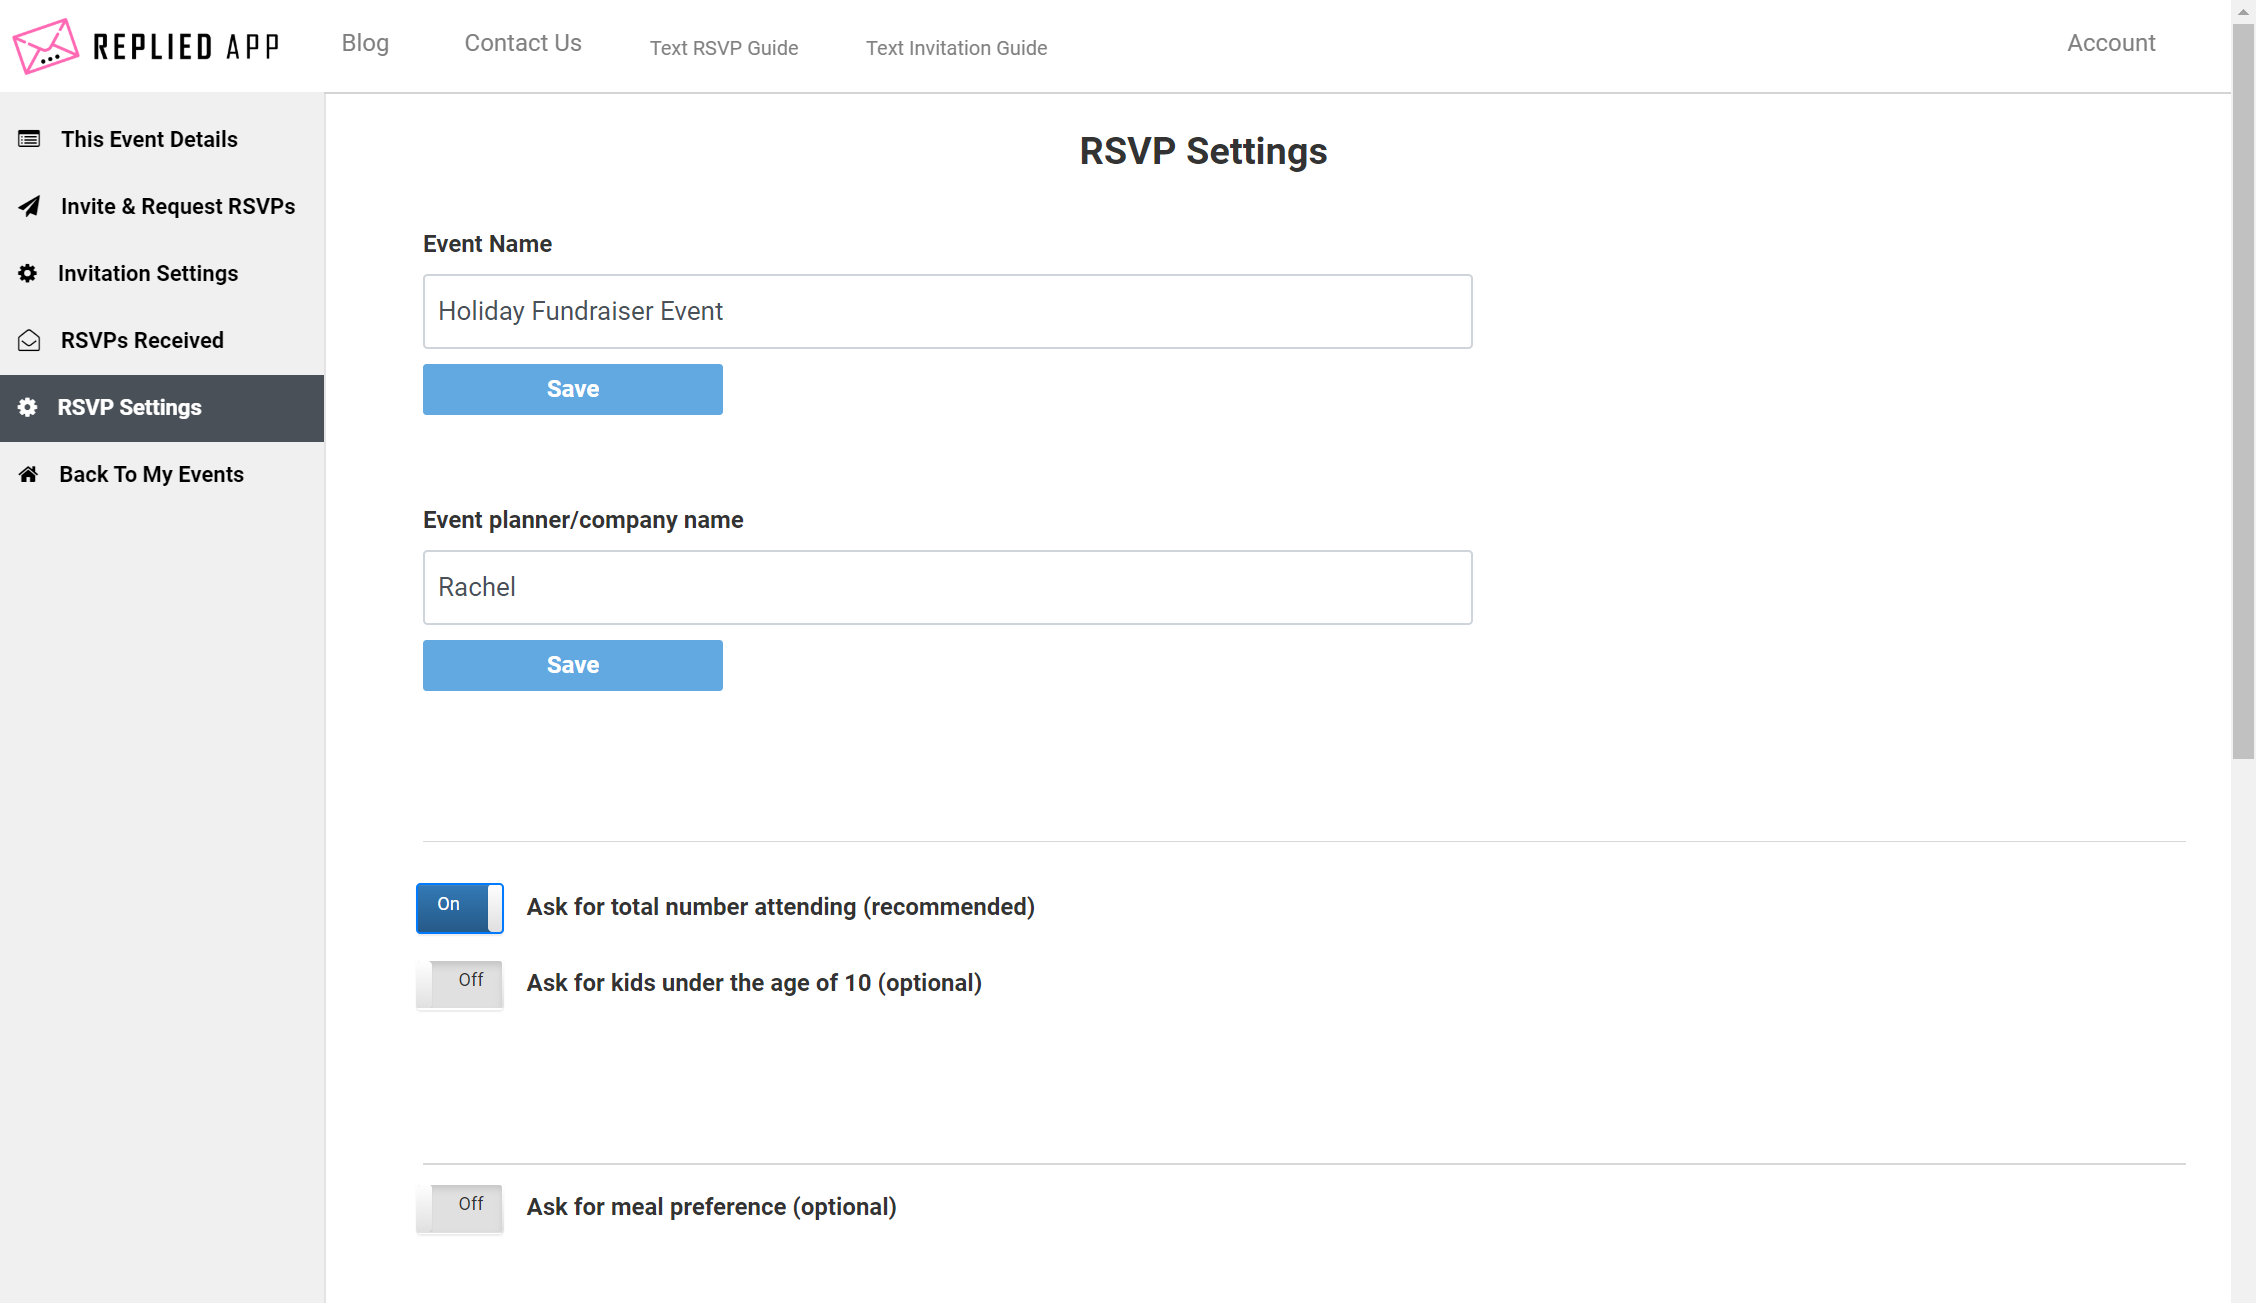
Step 2: Set your RSVP settings
Once you’ve created your event you’ll be taken straight to your RSVP settings page. This is an important page and you MUST set these settings!
On this page you’ll want to turn on any questions that you want to ask your attendees (ask for meal preference, ask for kids under 10, etc.). If you’re using the meal preference question or custom question you’ll also want enable them by clicking the on button and then edit the meal choices and the custom question text and click SAVE. You must enter 3 meal choices. If you have less than 3 meal choices, enter NA for one of the choices. If at any time you want to change your event name or your event planner name, you can come back to this page to change them.
Step 3: Set your invitation settings
Next, click “invitation settings” on the left side of the screen and you’ll be taken to the invitation settings page. At the top you’ll see a text box. This is where you enter all your additional event details – this is REQUIRED (besides the date and time). Type in the location of the event and any other information you want to share with your attendees. When you’ve entered everything, click SAVE.

If you want to limit your headcount for each household, click the on button next to “Limit headcount.” This will include a sentence that tells the household how many seats you have reserved in their honor. Your guests aren’t required to follow the limit you have given them but most do.
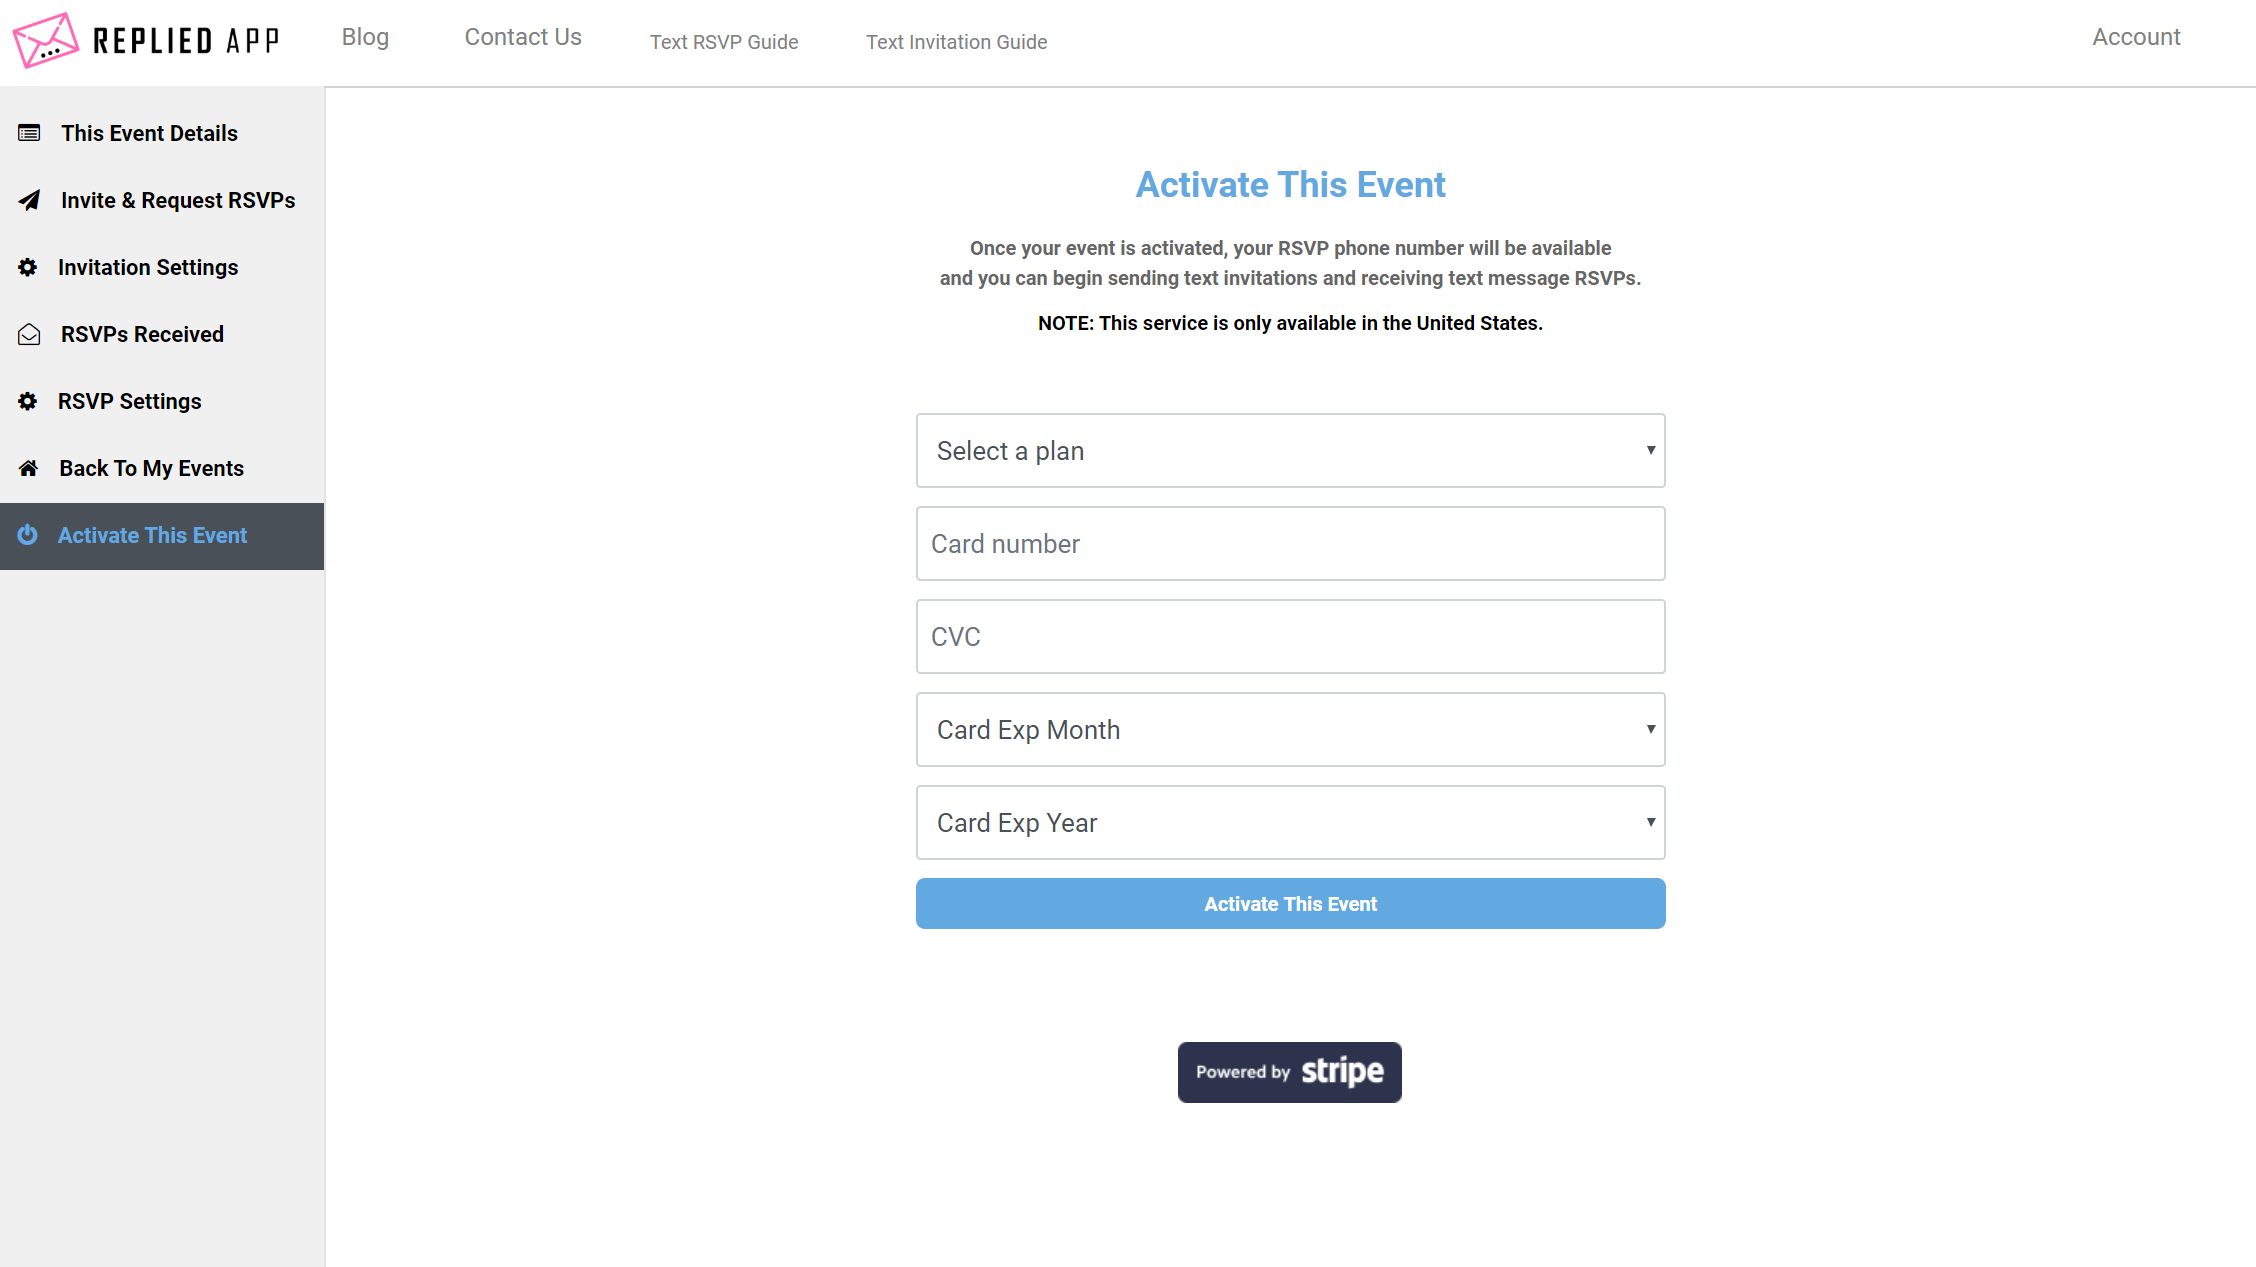
Step 4: Activate your event
Next, click the “activate this event” button on the left of the screen and you’ll be taken to the activate event page. Here you’ll select which tier you want and enter your payment information. Remember, the tier is based on how many households you have, not on your total headcount. Always buy more than you think you need, unexpected invitations are common for most events.
Step 5: Build your guest list
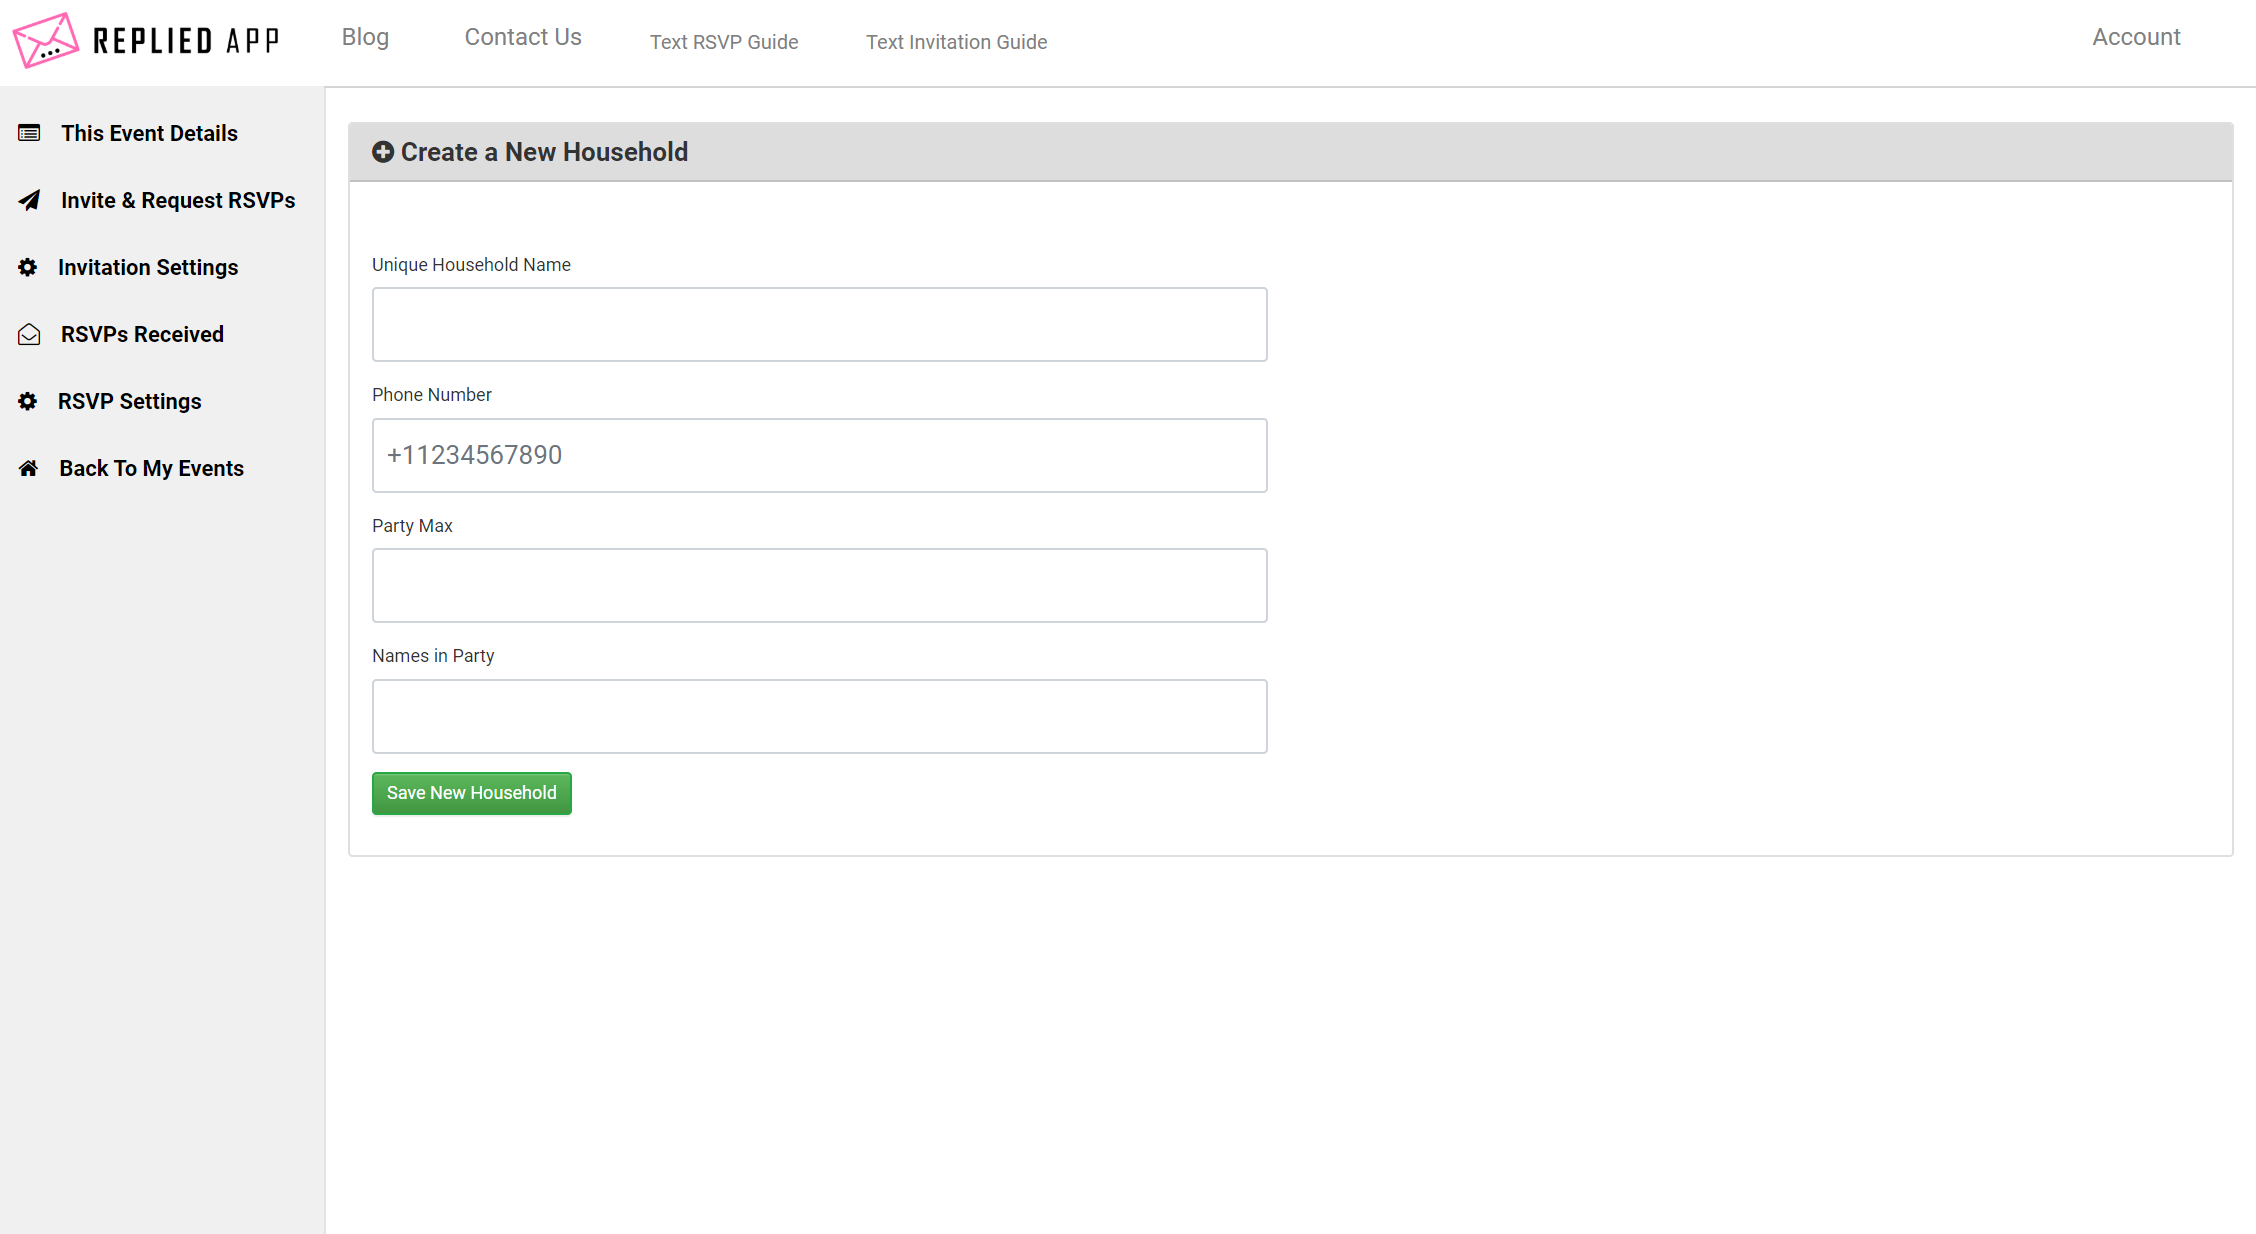
Now you’ll want to build your guest list, so click the “Invite and Request RSVPs” button on the left side of the screen. This is your invitation dashboard and will contain anything related to invitations. To add your first household, click the blue “+ New Household” button on the right side of the screen. Enter all the household information including AN ACCURATE CELL PHONE NUMBER FOR THE HOUSEHOLD.
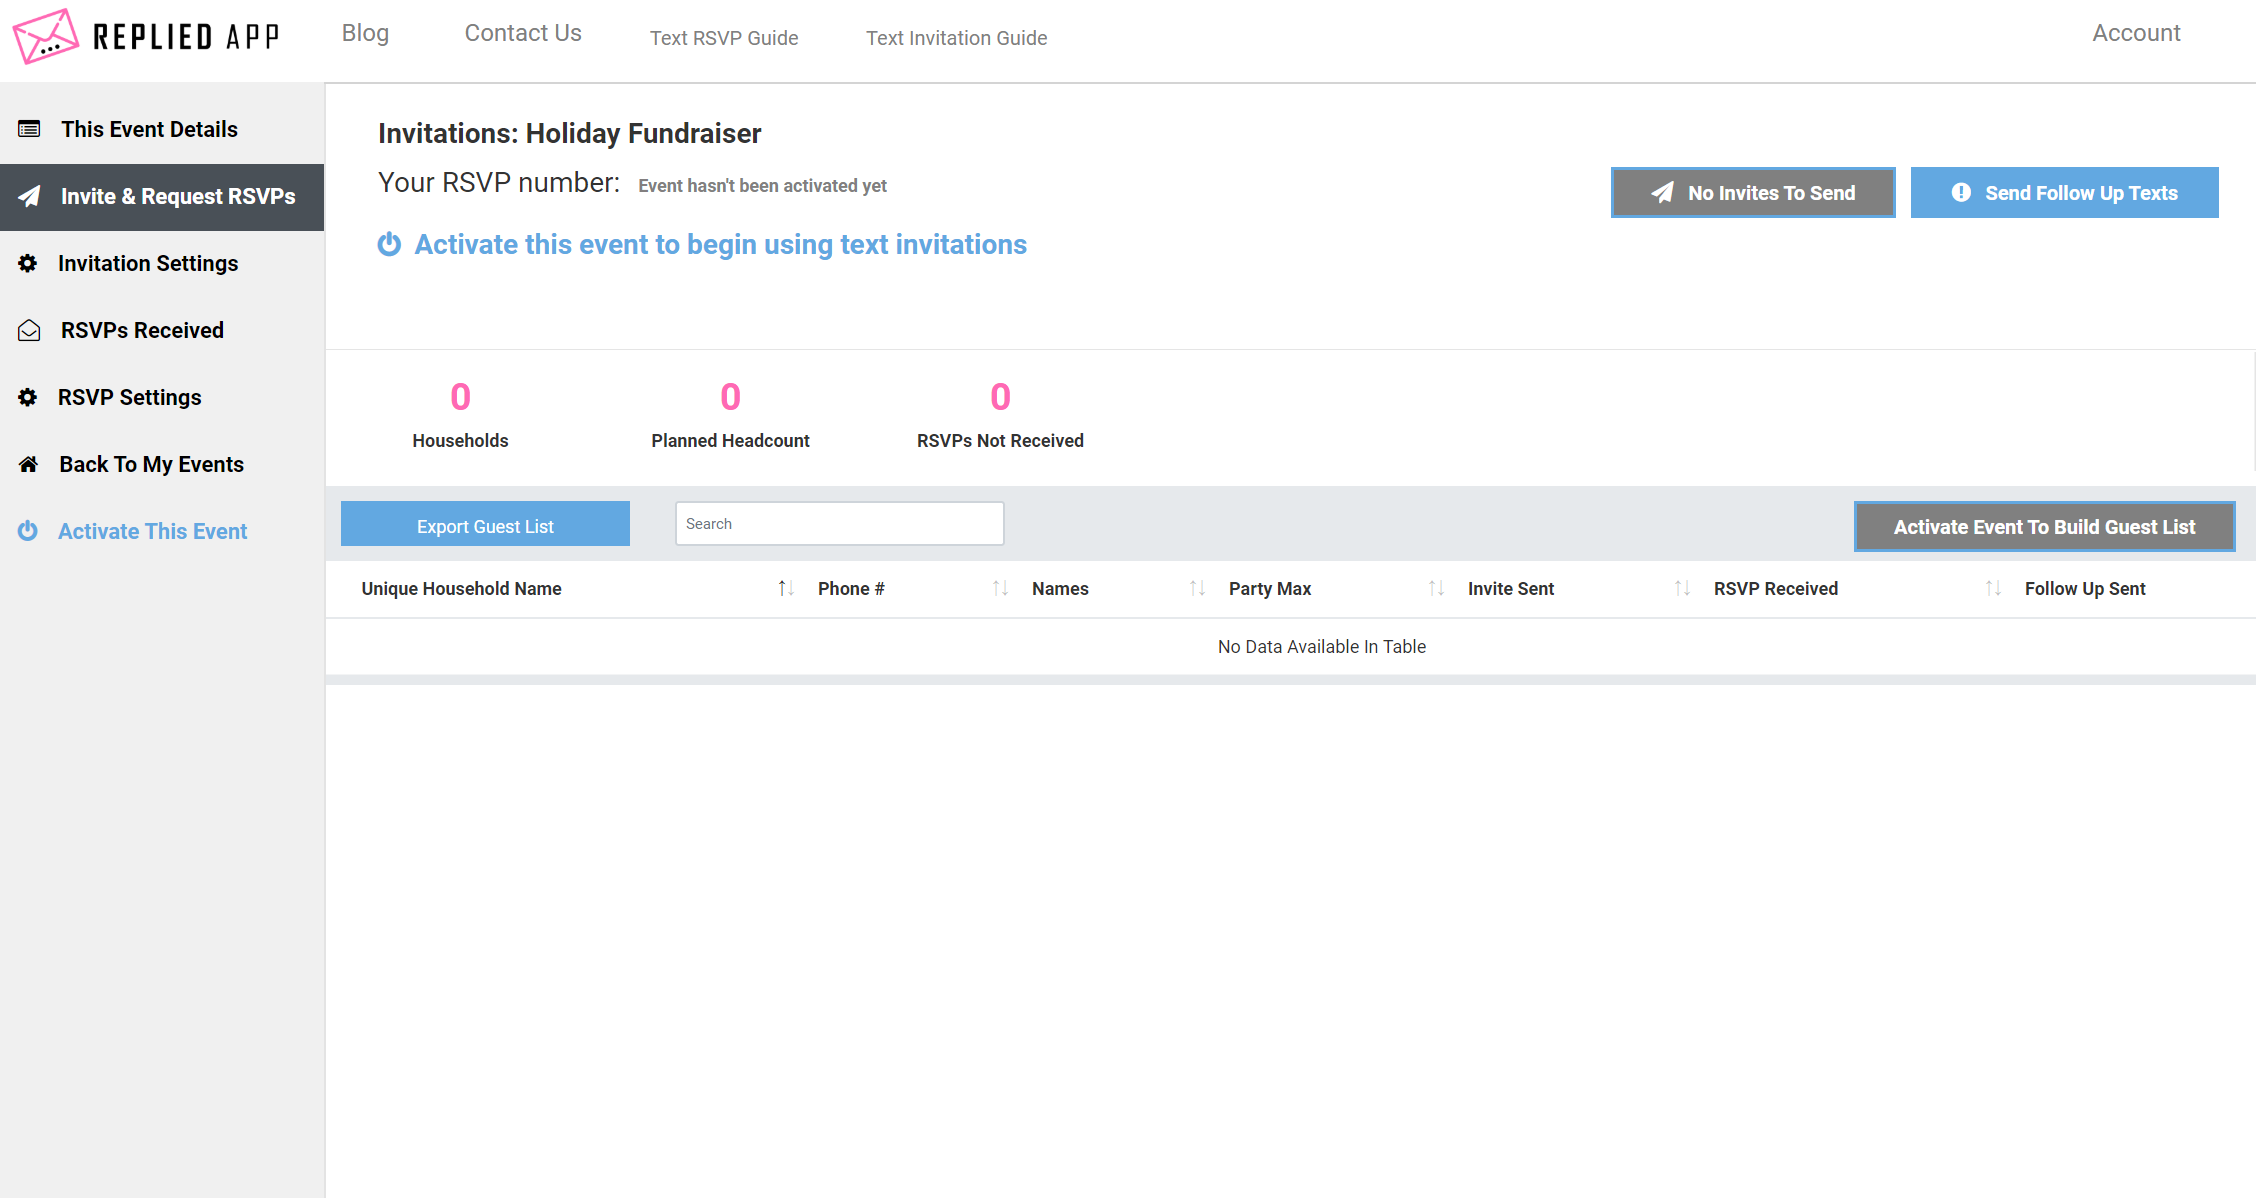
If you do not enter an accurate cell phone number for every household your invitations will not work and you will not get all your RSVPs. Continue adding households until you have everyone added. Remember, you can only add as many households as your tier allows.
Step 6: Send text message invitations
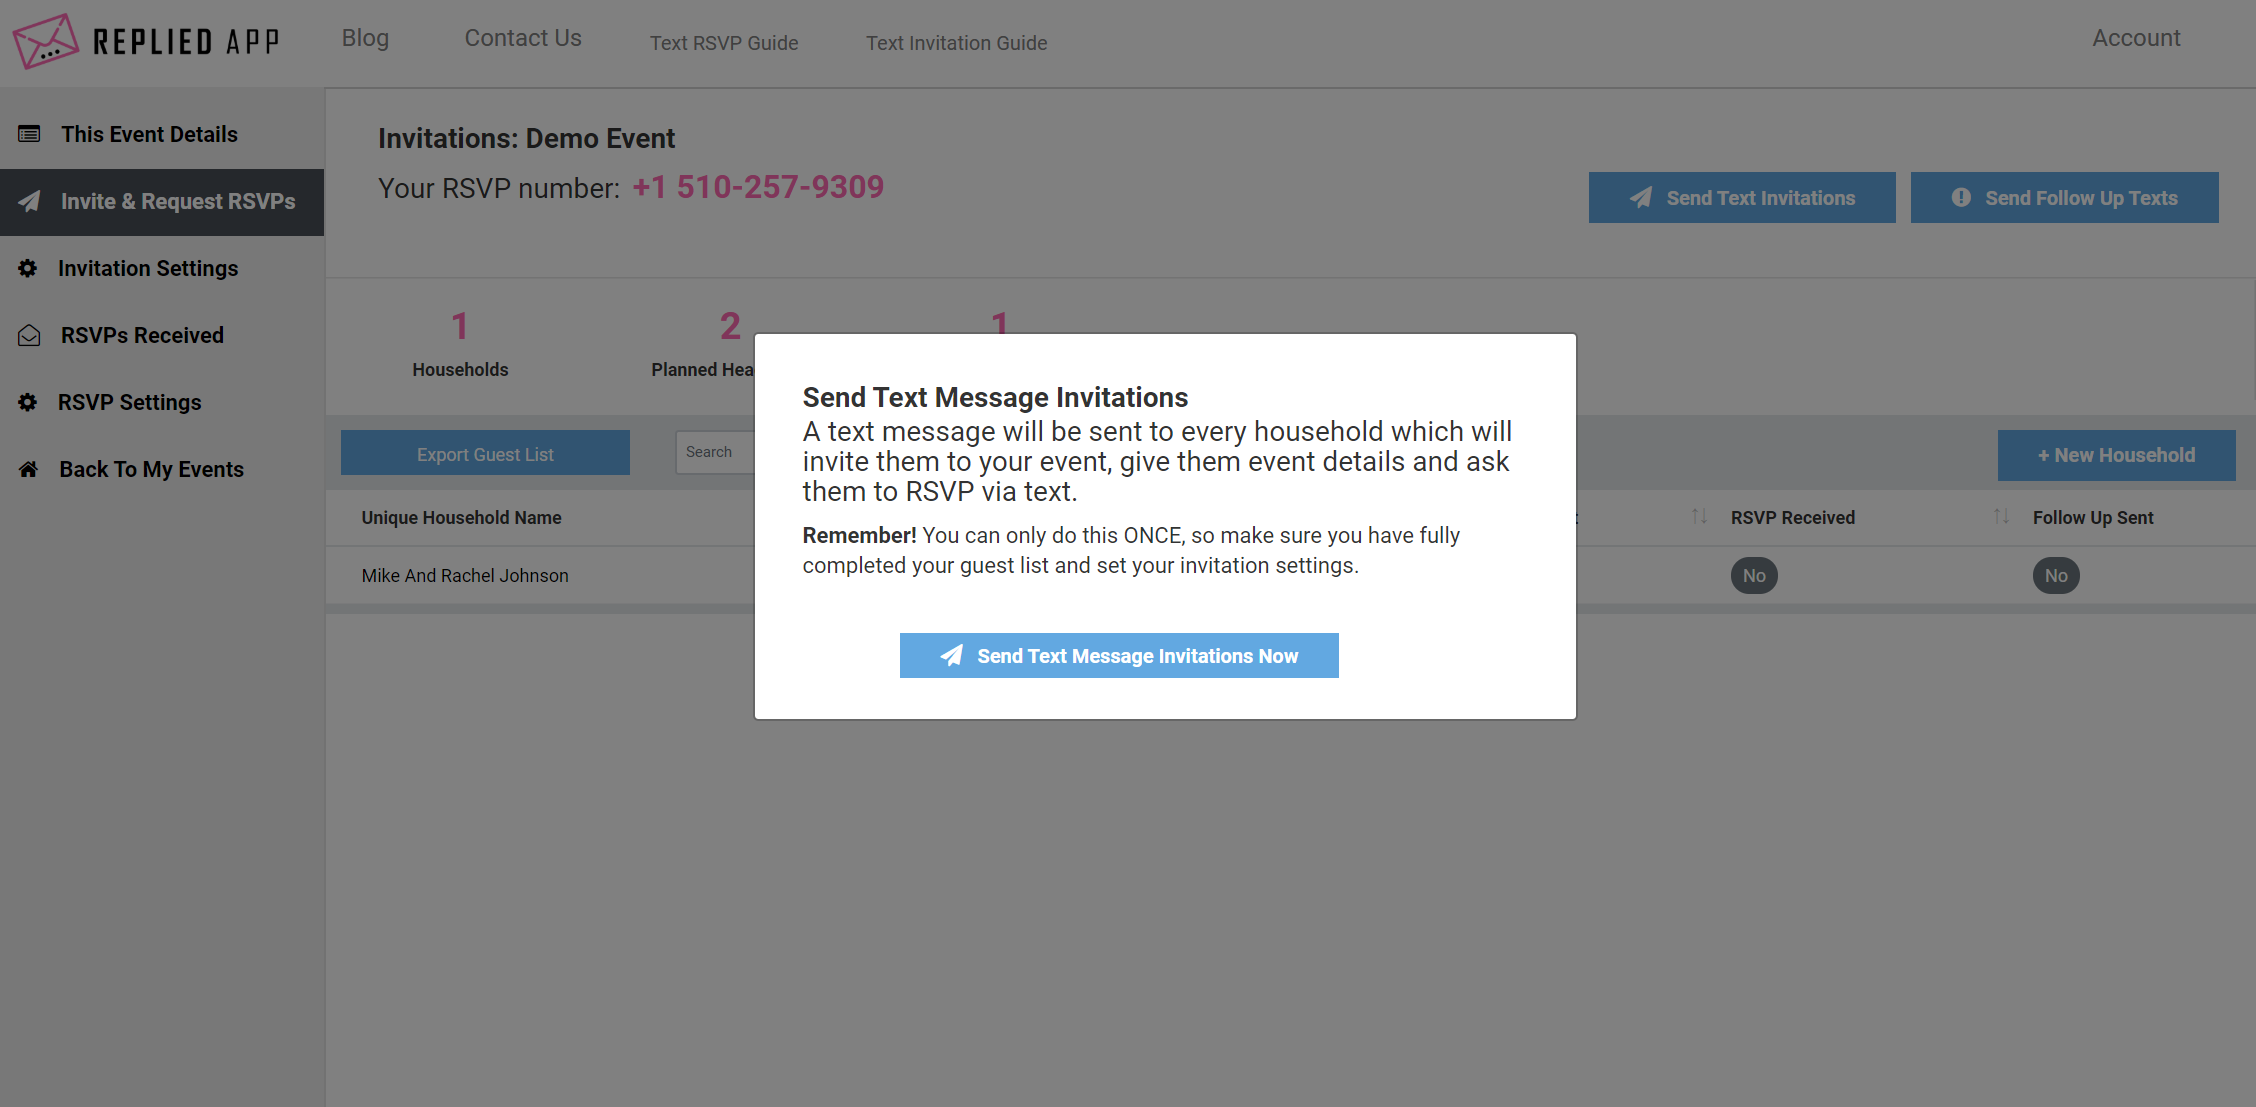
Now it’s time to send your text invitations. Click the “Send Text Invitations” button on the top right of the screen. This will send a text message invitation to every household on your guest list. It will also ask for their RSVP via text message.
Step 7: View RSVPs online
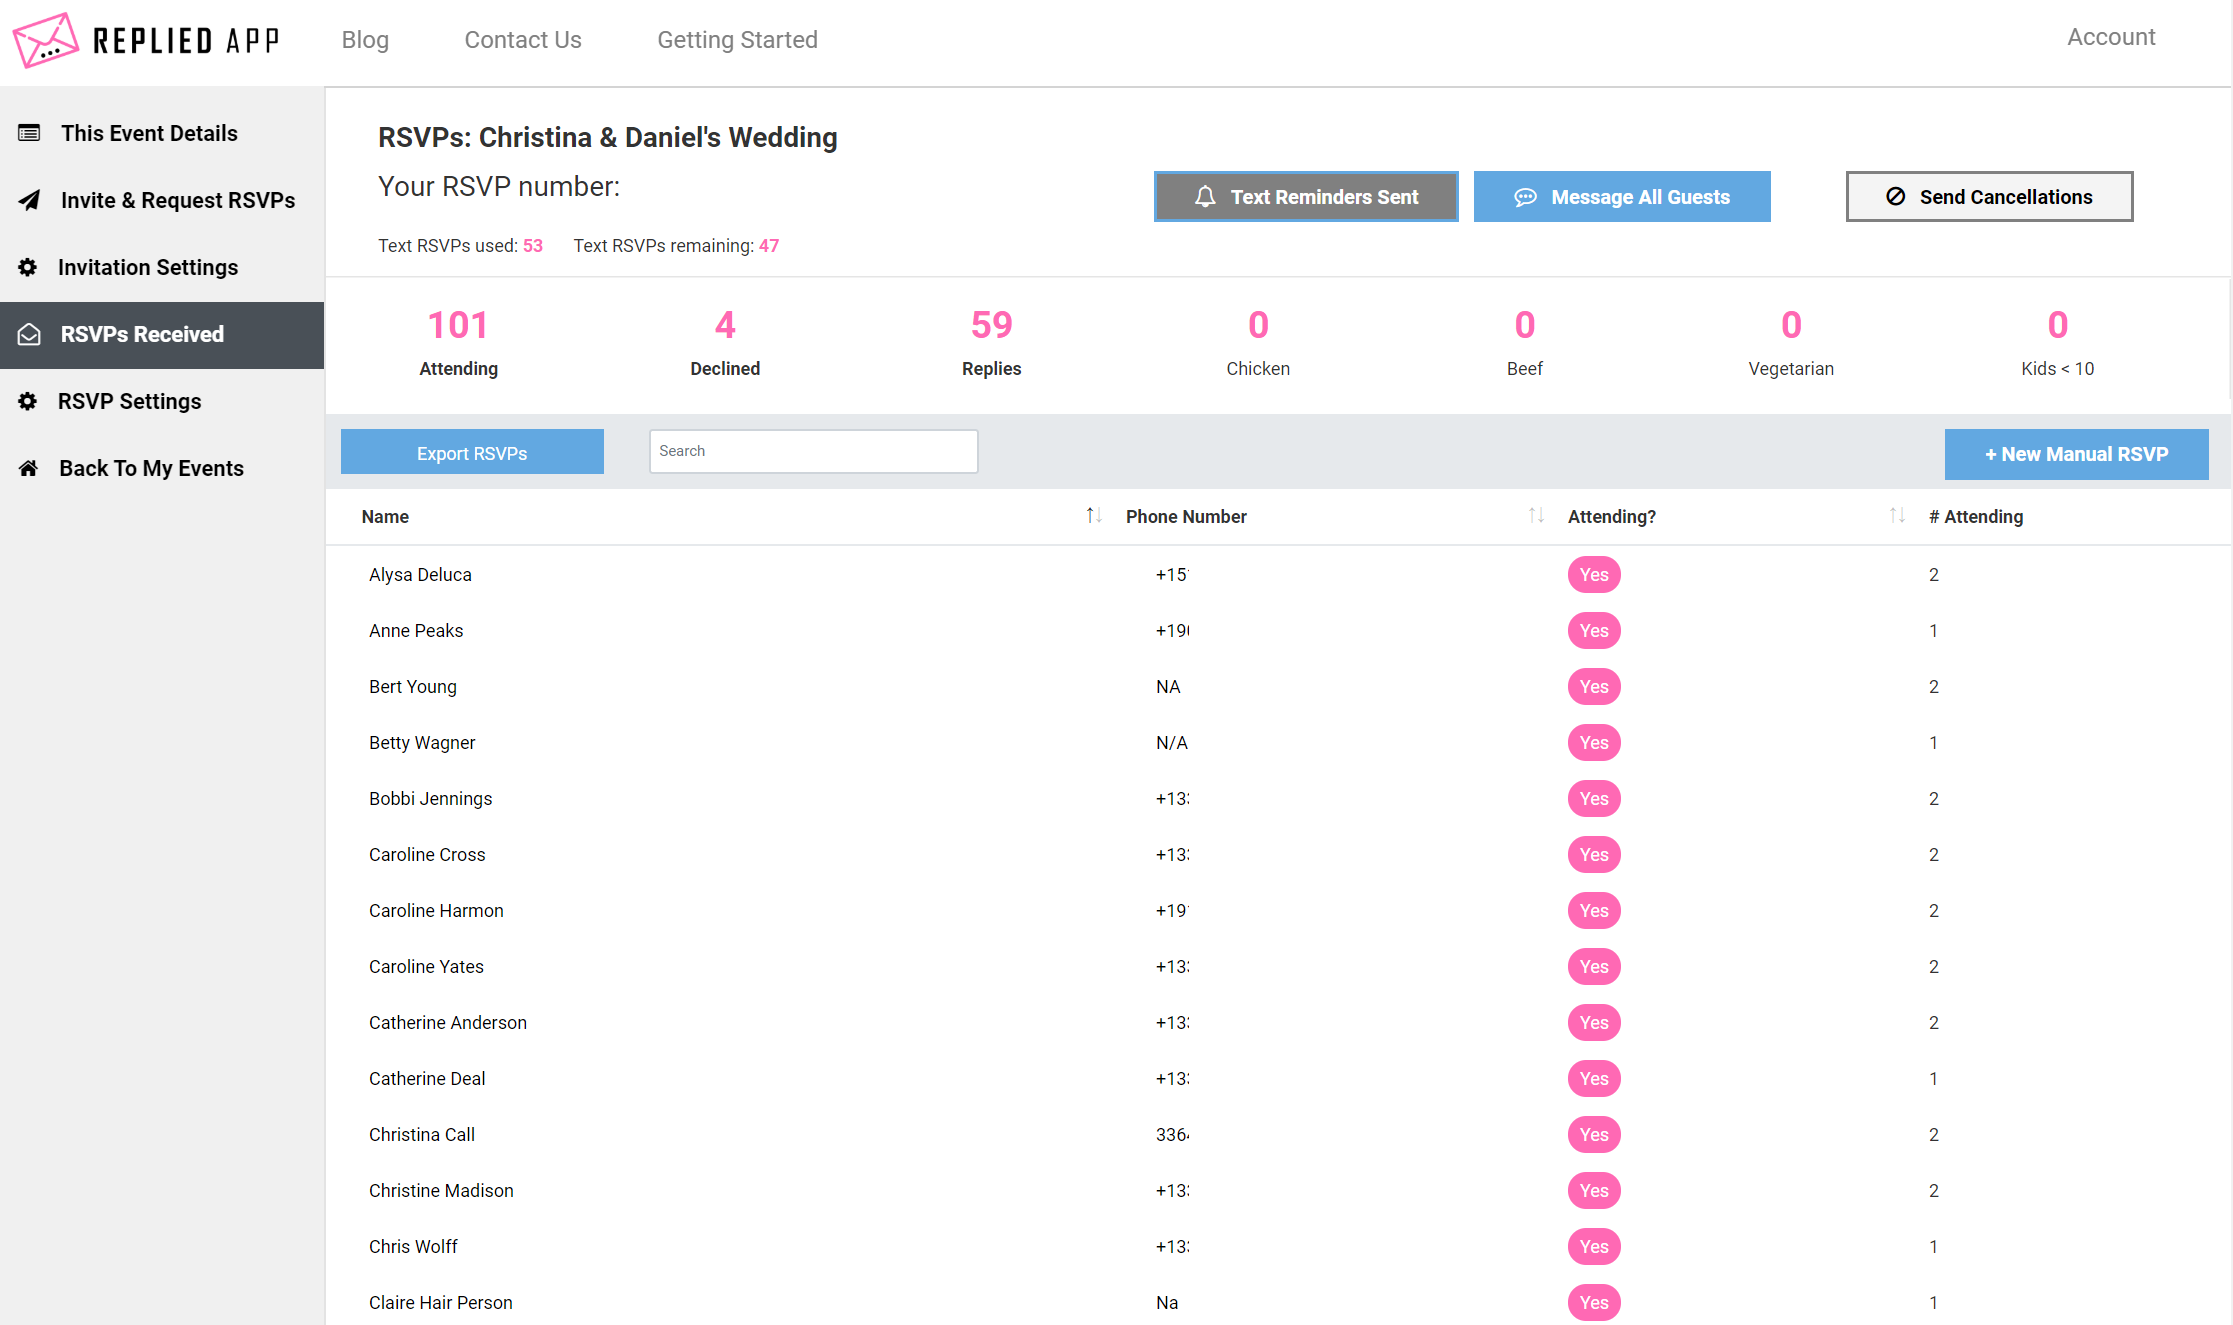
To view your incoming RSVPs, click “RSVPs Received” on the left side of the screen. Here you’ll see all your RSVPs that have come in and your total headcount will be at the very top of the screen.
Step 8: If necessary, send follow up texts
To check to see if any of your RSVPs have not been received, navigate back to the “Invite and Request RSVPs” page. At the top you’ll see a count for “RSVPs Not Received.” If this count is zero then great, you’re done! If it’s not zero, you’ll want to send text message follow ups.
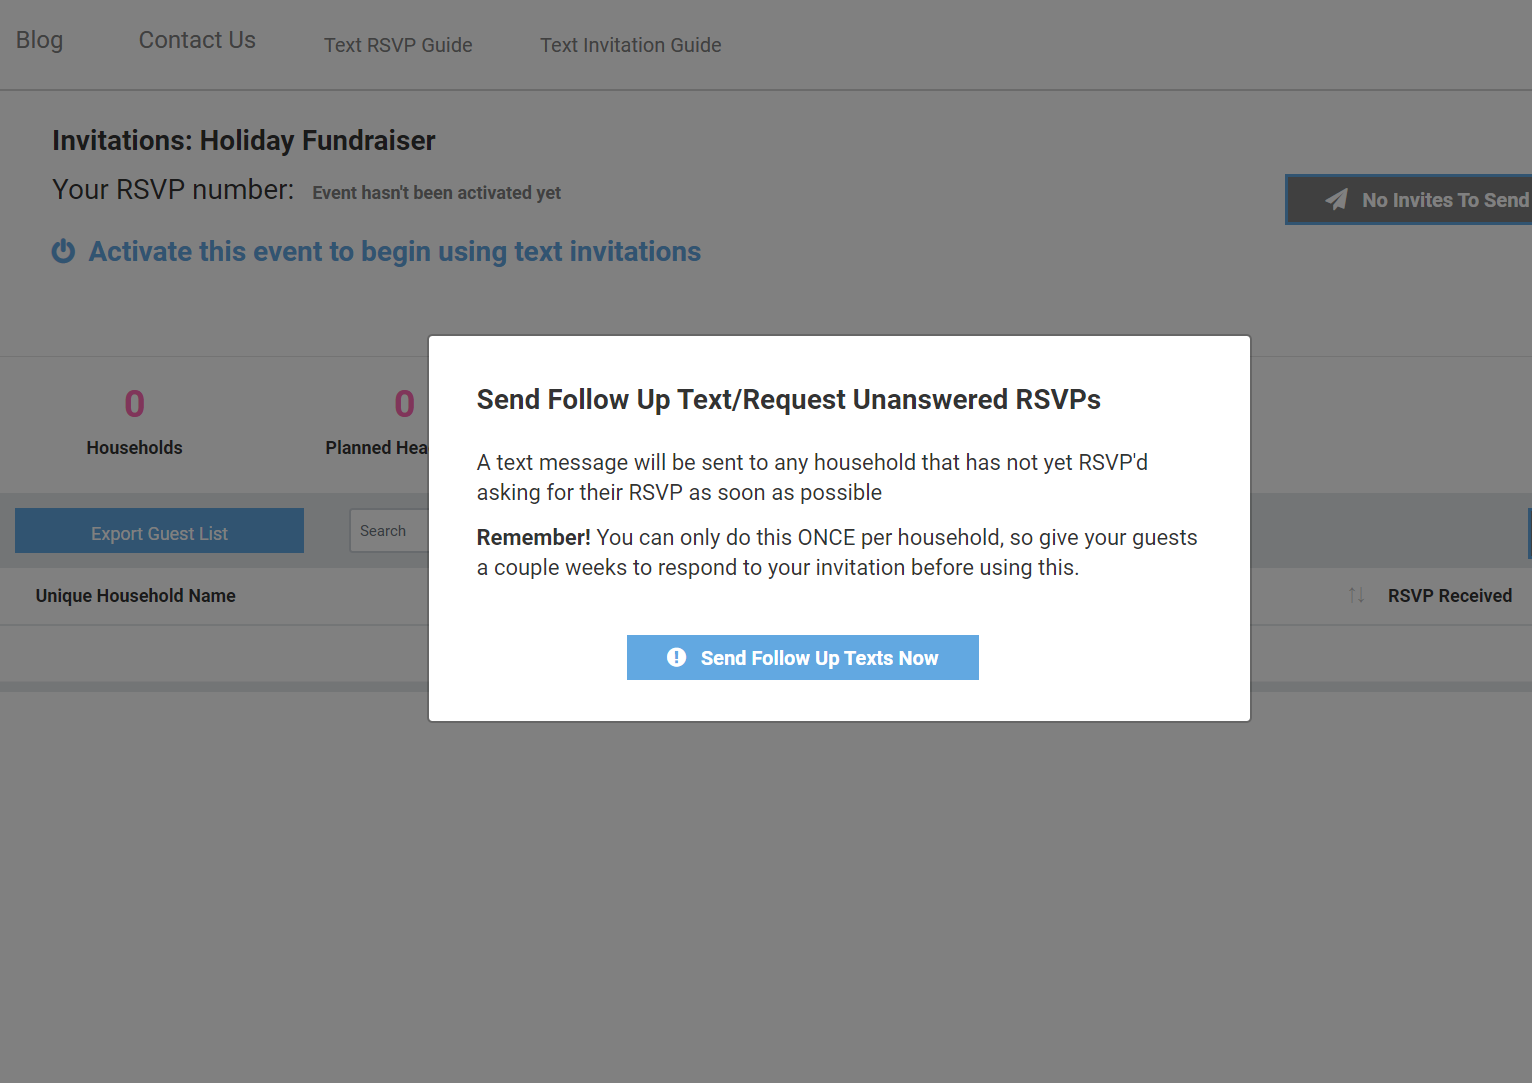
Click “Send Follow Up Texts” at the top right of the screen. This will send text messages to any households that have not yet sent in their RSVP and will ask for their RSVP as soon as possible. Click “Send follow ups now” to send them. This will usually get any stragglers that still haven’t completed their RSVP.