There are four easy (and important) steps to setting up your event with Replied App for text message RSVPs:
1 – Create a new event with the correct date and time
2 – Configure your event settings on the settings page
3 – Activate your event/enter payment information
4 – Add your text message phone number to your paper invitations and mail them.
1. Creating a new event
When you first login to Replied App, you’ll be brought to your home dashboard which lists all your events that you have created (none currently since this is your first time). To create your first event click the blue “+ New Event” on the far right of the screen.
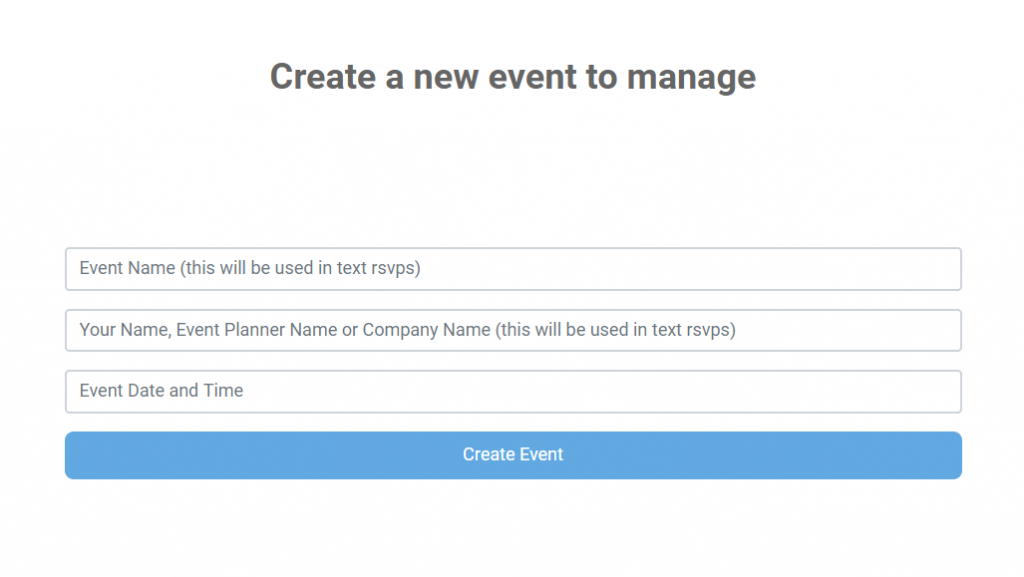
This will take you to the page in the image below.
— Enter your event name in the event name field (this will be included in the text messages that your guests will receive).
— Enter your name (or your event planner’s name) in the event planner field
— Click the event date and time dropdown. Select the CORRECT date AND the time of your event. It’s important that this is accurate because it CANNOT be changed later.
2. Configure your event settings
In order to use a custom text message question, ask for meal preference over text message, or any of the other many features of Replied App, you must configure your event settings before you send out your invitations.
To do this, head over to the “Settings” page. You’ll see the link to that page on the far left of the screen. By default, your settings are set to ask for number of guests attending and nothing else, so be sure to set these if you want to use any of the other features.
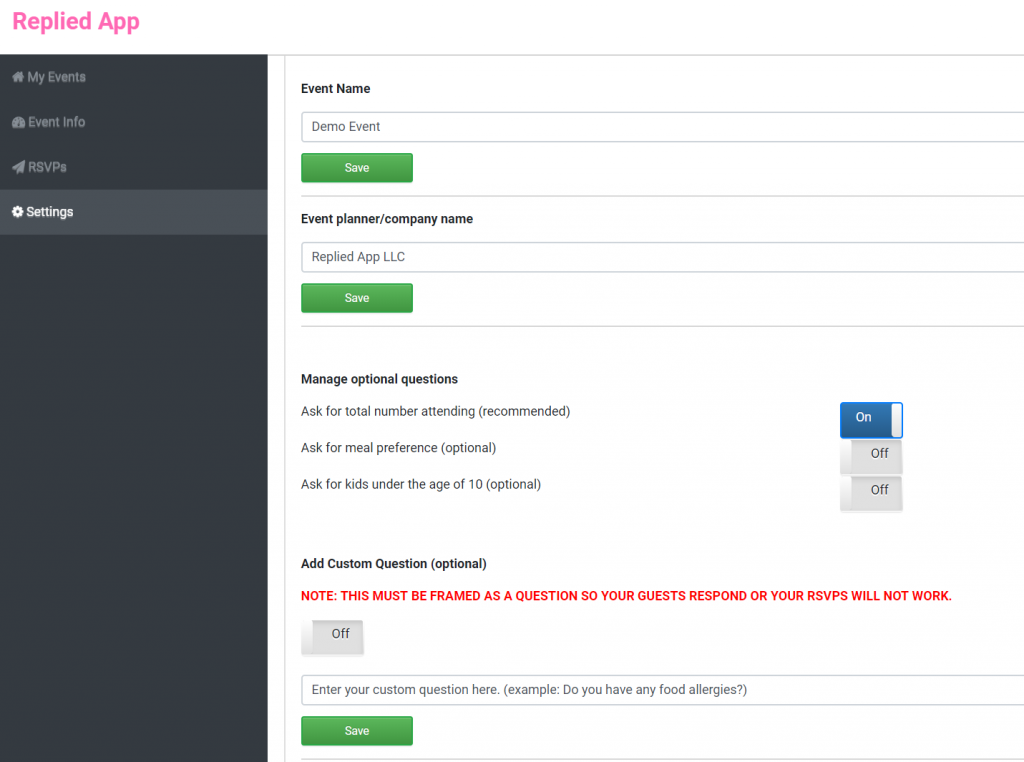
Additional Settings Info – Using a Custom Text Message Question
If you want to ask a custom question, you’ll need to click the slider button to enable the custom question. Now that the custom text message question is enabled, click in the custom question field and type in the question that you want to ask your guests and click “Save”. This custom question MUST be framed AS A QUESTION.
If you do not frame your custom question as a question, your guests will not reply and the RSVP process will not continue to the end.
If you are just wanting to use the custom question to give additional information (like travel details, hotel, bus, etc.) you can do so but it MUST BE FRAMED AS A QUESTION.
For example, if I wanted to let everyone know the bus will arrive at the wedding to take everyone to the reception at 6:30pm, I could have the custom question say “The bus will be arriving at the wedding to take guests to the reception at 6:30pm, will you be riding?”
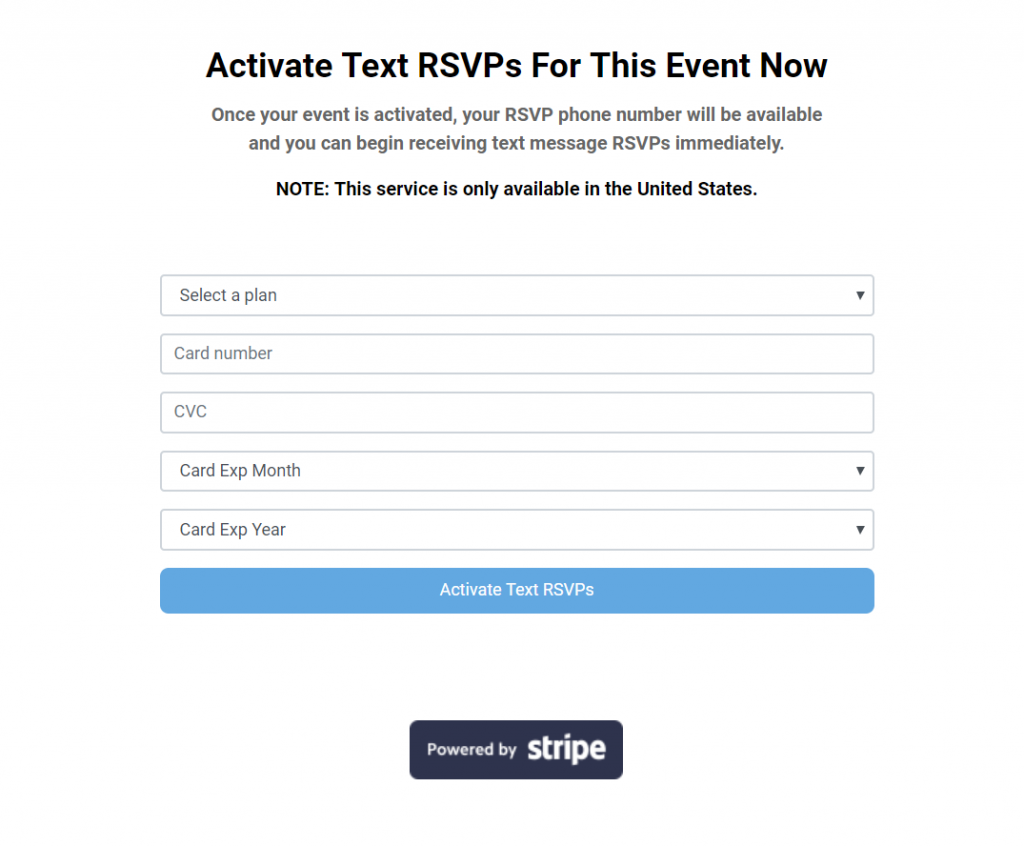
3. Activate your event
Now that your event is setup and ready to go, you’re ready to pay for your event and receive your dedicated text message RSVP phone number.
Click the “Activate” link on the left side of the screen. On this page you’ll select your RSVP package in the first dropdown and then enter your payment information to make a one time payment for the event. Remember, 1 Text RSVP = 1 invitation/party. You’ll receive a receipt from stripe in your email (this is useful if you need to use it to do expense reports if you’re a professional event planner).
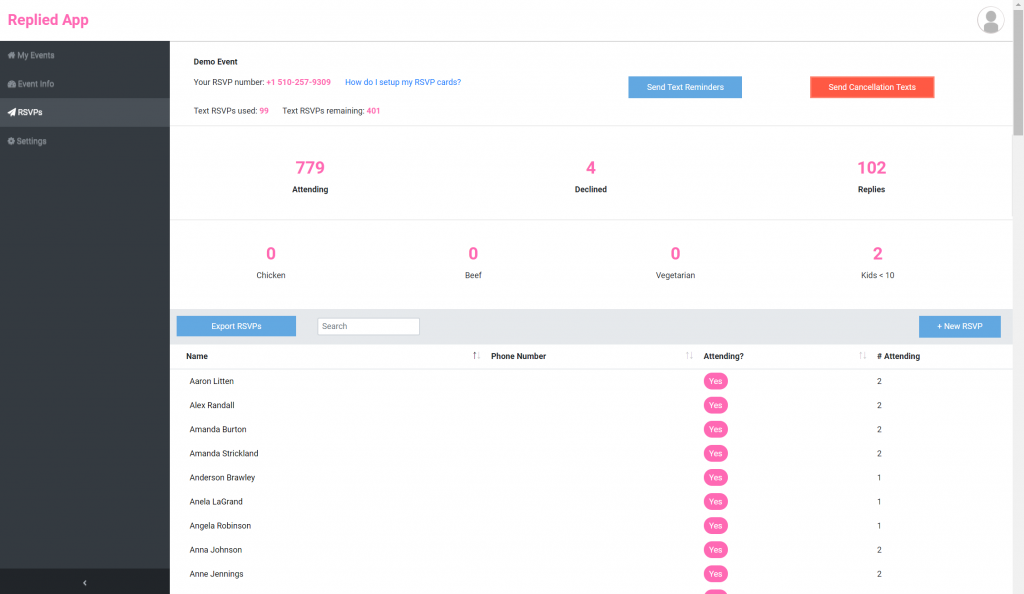
4. Add your RSVP Phone Number to your invitations or RSVP cards and mail them to your guests
To view your RSVP phone number, click the “RSVPs” link on the left side of the page. On the RSVPs page, you’ll see your RSVP phone number on the top left of the screen. Add this phone number to your RSVP cards of invitations with the wording “We are using Replied App to gather our invitations, to RSVP, please send a text message to 123.567.7890”
That’s it! Now, all you have to do is watch as your RSVP replies come in automatically (they will show up on the “RSVPs” page). Phone numbers have been blurred out in this image for privacy.
If you would like to see some examples of invitations, logout of Replied App and return to the homepage (there are multiple examples at the bottom). Also, there is a separate guide to setting up invitations for your convenience at www.replied.app/invitations